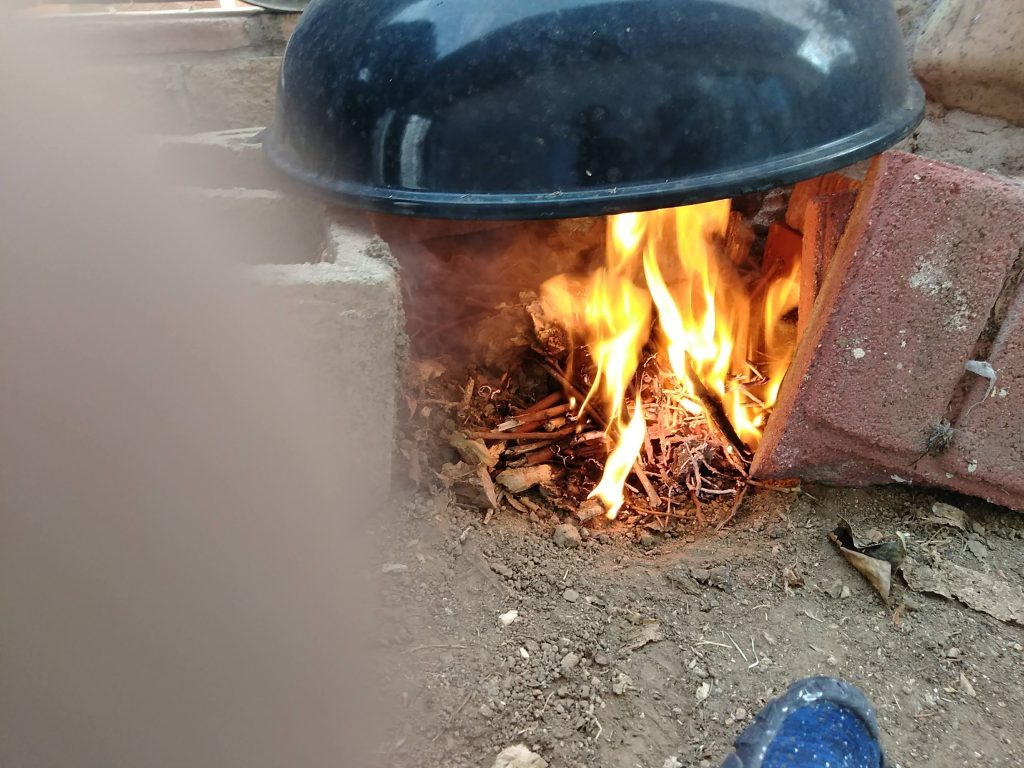
Burning wood instead of using a gas or electric range is one way to reduce your carbon footprint a little bit. Roasting chiles are a great way to use wood, because they are best roasted at a high temperature. By putting out the fire at the end, and producing a little charcoal, and then burying it, you can sequester some of the carbon.
Here’s a video explaining the fire-building and roasting process.
Roasting Chiles in an Oven is Easy, Roasting On a Gas Range is Better, but Roasting Over Wood is Best
- Roasting in an Oven
- Pros
- Requires little “hands on”.
- Warms the room.
- Cons
- Burns fossil fuels.
- Takes a lot of energy to bring the oven up to temperature.
- Pros
- Roasting on a Gas Range
- Pros
- An authentic flavor.
- It’s pretty easy.
- Takes less energy than the oven.
- Cons
- Burns a fossil fuel.
- You need to watch it and flip it over.
- Pros
- Roasting over burning wood.
- Pros
- Good flavor.
- Does not burn a fossil fuel.
- Gets rid of some waste wood.
- A hot fire around 600F cooks it fast.
- Cons
- Smoke and fire risk.
- You need to watch the chiles and flip them over.
- You need to saw wood.
- Pros
What Kind of Wood is Good to Burn
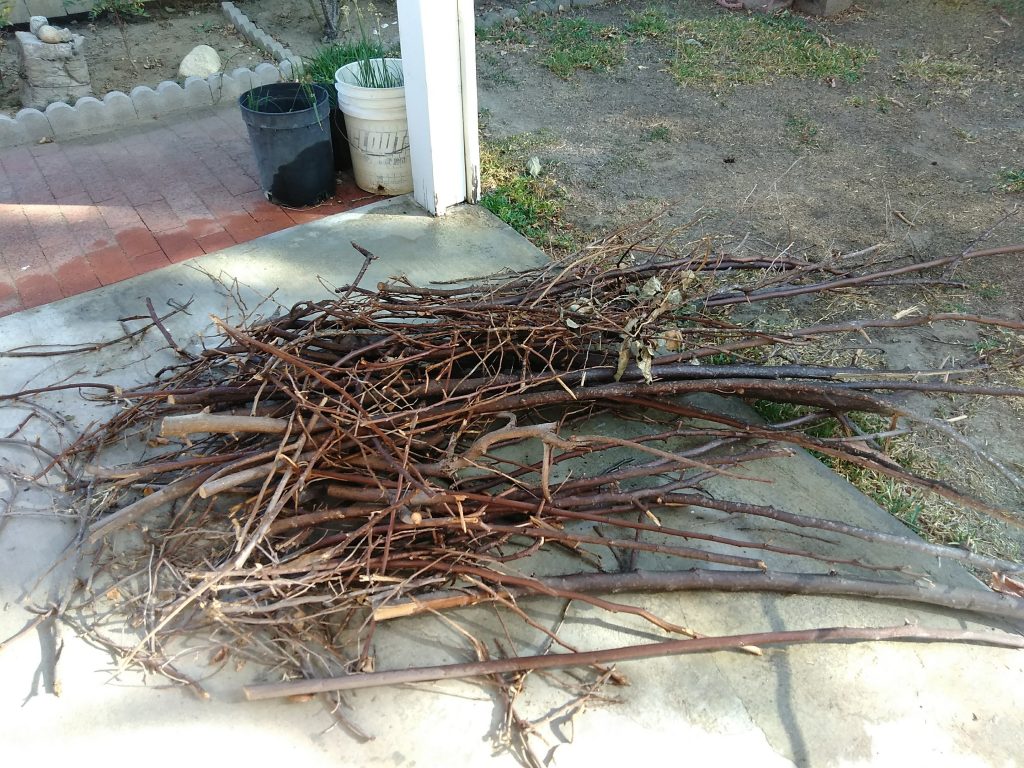
I used a dead cheremoya tree. It wasn’t a good wood, but it wasn’t horrible.
Hardwoods are favored, particularly nut woods, because they burn slower and have more energy. Fruit woods are usually a little softer, but are also fine, and have a good flavor. There’s a fair amount of dead oak around Los Angeles and Southern California, so keep an eye out for this. Also, maple is often used as an urban landscaping tree, and it can be burned.
The bad woods to burn are softwoods like pine, and also cedar and sycamore. Eucalyptus is also bad. Any aromatic wood is a problem because they have a nasty flavor, and also tend to burn very hot.
Treated woods, like pressure-treated boards, are toxic and shouldn’t be burnt.
Also, it’s not good to burn painted or varnished woods for cooking.
Cutting the Wood
I just used a small saw. I cut partway through the twigs and branches and stepped on them to crack the wood. You need to dry the wood before you do anything to it, or it won’t burn hot.
Drying dead wood takes anywhere from a week to a few months, depending on the humidity and temperature.

I used a pruning saw. It’s okay. There’s better options, though, like a folding saw from Corona. These newer saws have a flat edge and the teeth are cut into the steel.
Fire Safety
Because we have fires out here, I hosed down the area with water, and also gave the wood pile a spraying. I won’t be able to burn it for a while, but, safety is more important.
If I had the energy, I would have cut the wood and stored it elsewhere.
What Kind of Chiles to Roast? Hatch?
Nope. Hatch chiles are nice, but their skins are not that thick.
You want Poblano chiles, which are usually sold in Mexican markets as Pasilla chiles. This is according to Wikipedia. I only knew them as pasilla. Anyway, it’s these chiles:
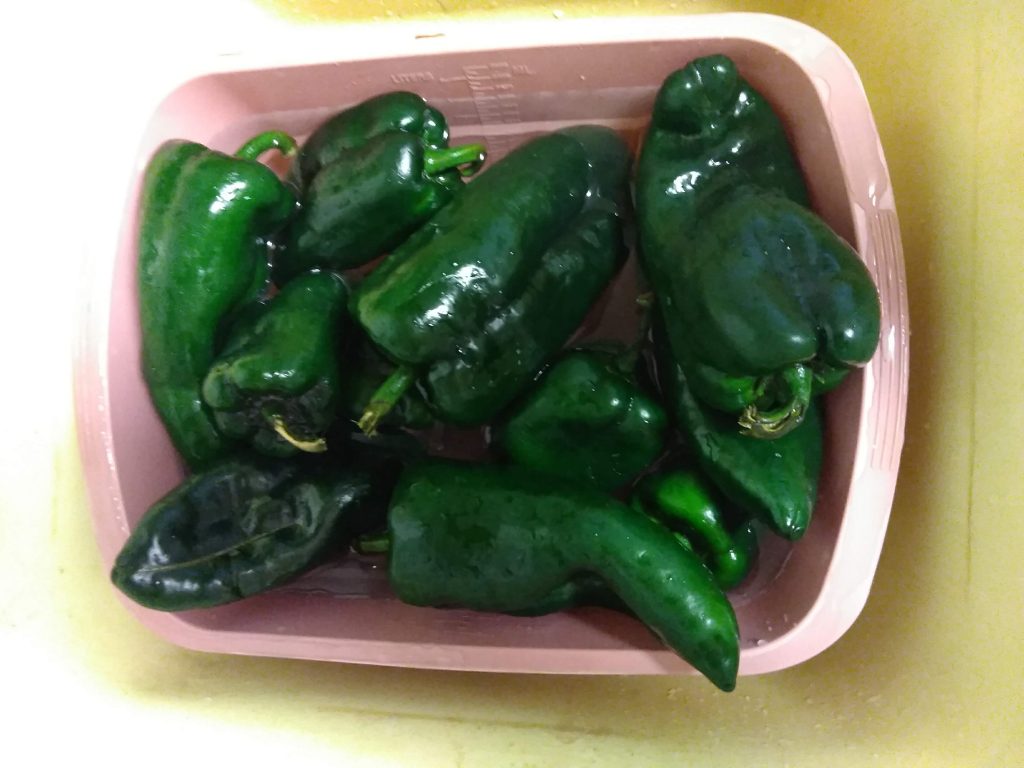
While there are many chiles to roast, these are widely available, at least in areas of Southern California where Mexican immigrants live.
They’re inexpensive, mild, and, most importantly, have a thick skin that stands up to fire, and must be removed before eating.
Other chiles, like the Anaheim, or Bell Pepper, or even some Hatch varieties, were bred to have thin, edible skins. Those must be avoided, because the smoke and heat will overwhelm them.
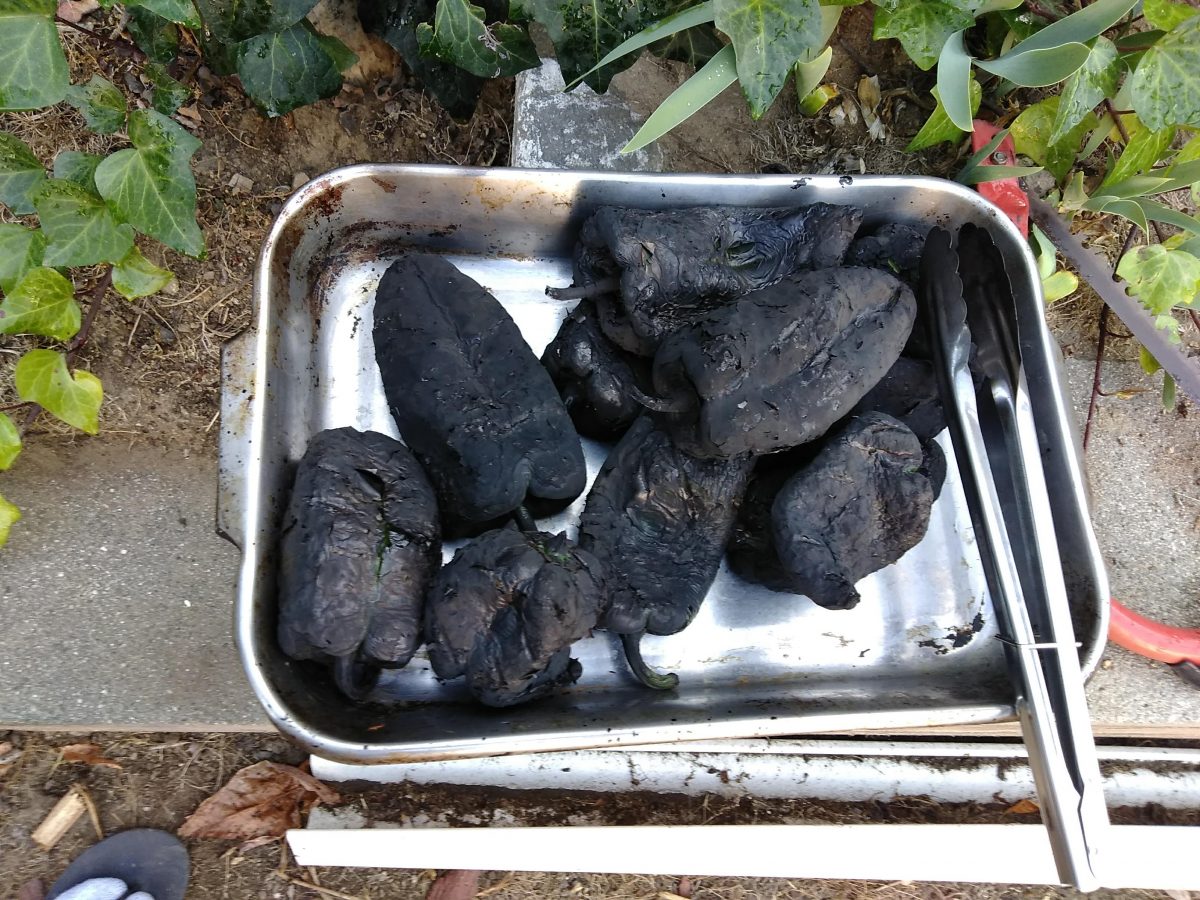
Here’s what they look like when they’re completely roasted:

These skins are not just burnt – they are covered in soot from the burnt wood.
To peel them, wait until they are cooled off, and then “rub” the skins off. The burnt, black parts will slide off, revealing a slippery, green chile underneath.
I peeled them, and put them into used tofu containers, and wrapped in plastic bags, for freezing. They keep for at least a month, but I’ve always finished them up within the month, so don’t know how long they can keep.
The peeled chiles can be used for chiles rellenos, but I’m too lazy for that. I just eat them as they are, or with some cheese or eggs.
Producing Charcoal
If you put out a wood fire by cutting off the air supply, the fire will stop burning. If you keep the air supply off, the embers will burn out, and you’ll be left with unburned wood and charcoal.
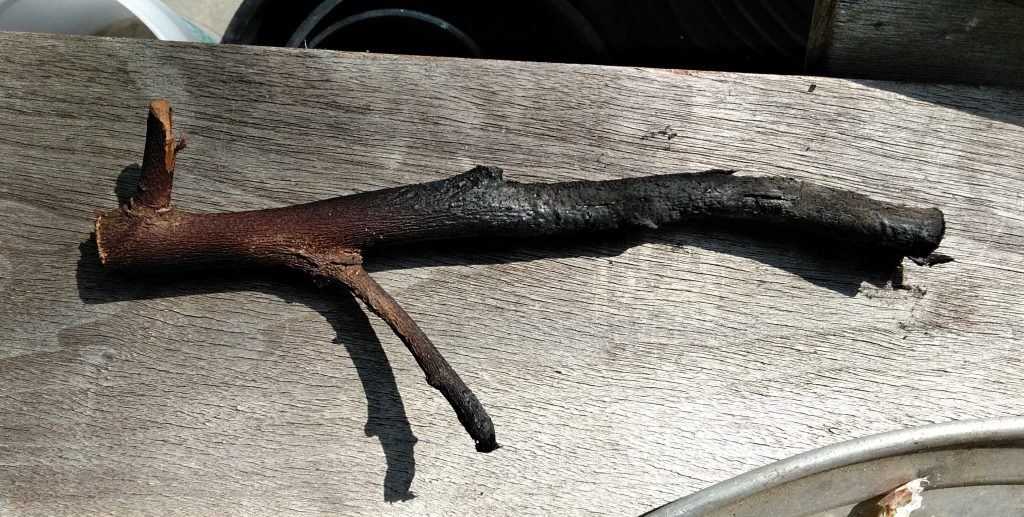
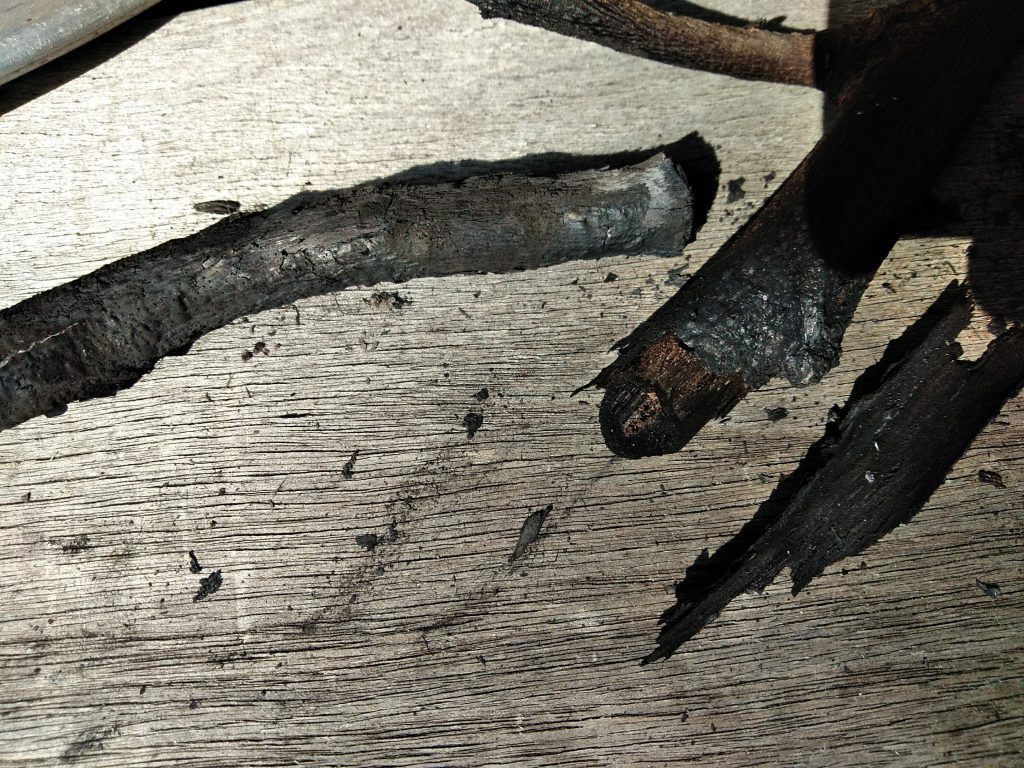
That metal plate I threw on the grill actually helped with the charcoal formation. This twig was under the metal, and is nearly half charcoal.
The charcoal part will snap off easily, and can be crushed.
Charcoal broken from the twig. 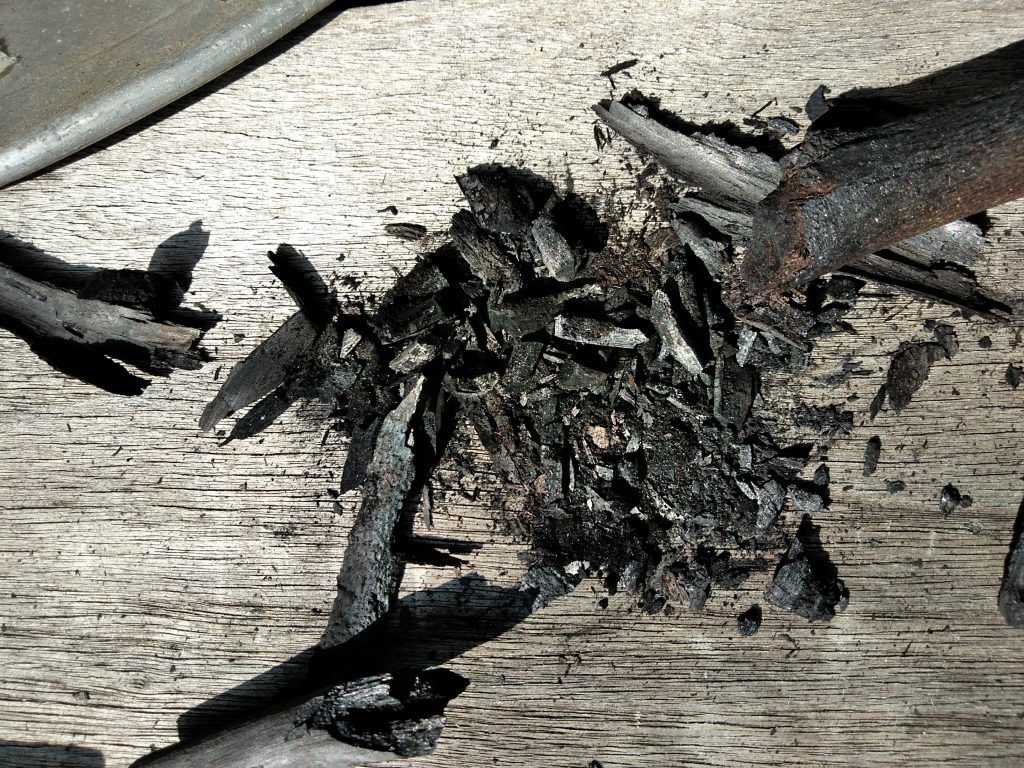
Charcoal crushed.
What is Biochar?
Biochar is a charcoal that’s intended for use as a soil amendment, and a way to sequester carbon dioxide.
Charcoal comes in numerous forms, commercially. There’s charcoal briquettes for a BBQ, lump charcoal, similar to what we produced, activated charcoal for filters, charcoal for art, and other forms. “Biochar” generally refers to a form intended for use as a soil amendment.
Biochar was based on studying the land management technologies developed by indigenous people in Brazilian rain forests. By burying burnt waste, they developed terra preta, black soil, that made farming possible in areas where the soil wasn’t very productive.
It’s suspected this technique is ancient, and global, and is an art that was lost among the “civilized” people in industrial society.
Biochar is made from any organic waste, like wood, shells, husks, and other woody material. After heating produces biochar, it’s crushed, to improve incorporation into the soil. This is in contrast to lump charcoal, which is generally made from pieces of wood, and kept in fist-sized pieces.
Biochar is a soil amendment, but it doesn’t work like a fertilizer. It’s almost like the opposite of a fertilizer: it acts like a “sponge” or an activated carbon filter, that sucks nitrogen and other nutrients out of the soil and into the carbon.
However, the “sponge” stays in the soil, as a supply of nutrients and for plants grown in the soil. It’s a long-term improvement strategy that takes years and may persist for centuries.
I’m still researching how to use the charcoal, and will update when I actually bury some of it.
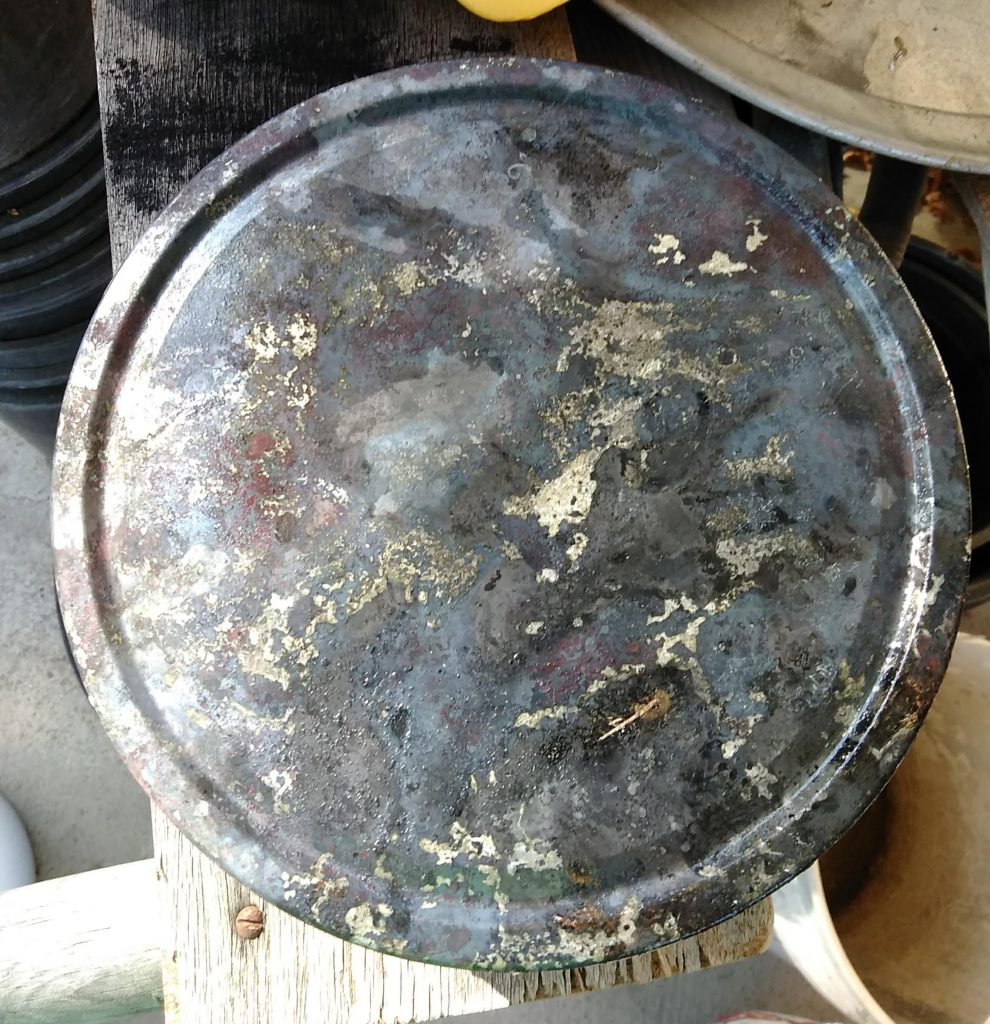
Biochar in a Cookie Can
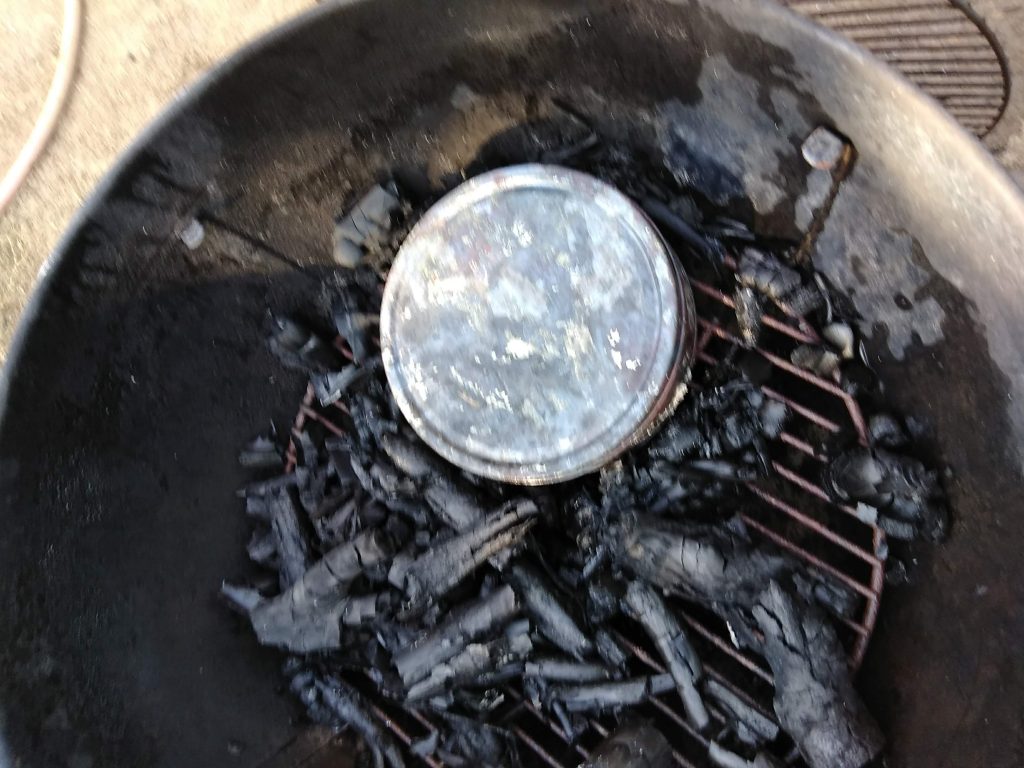
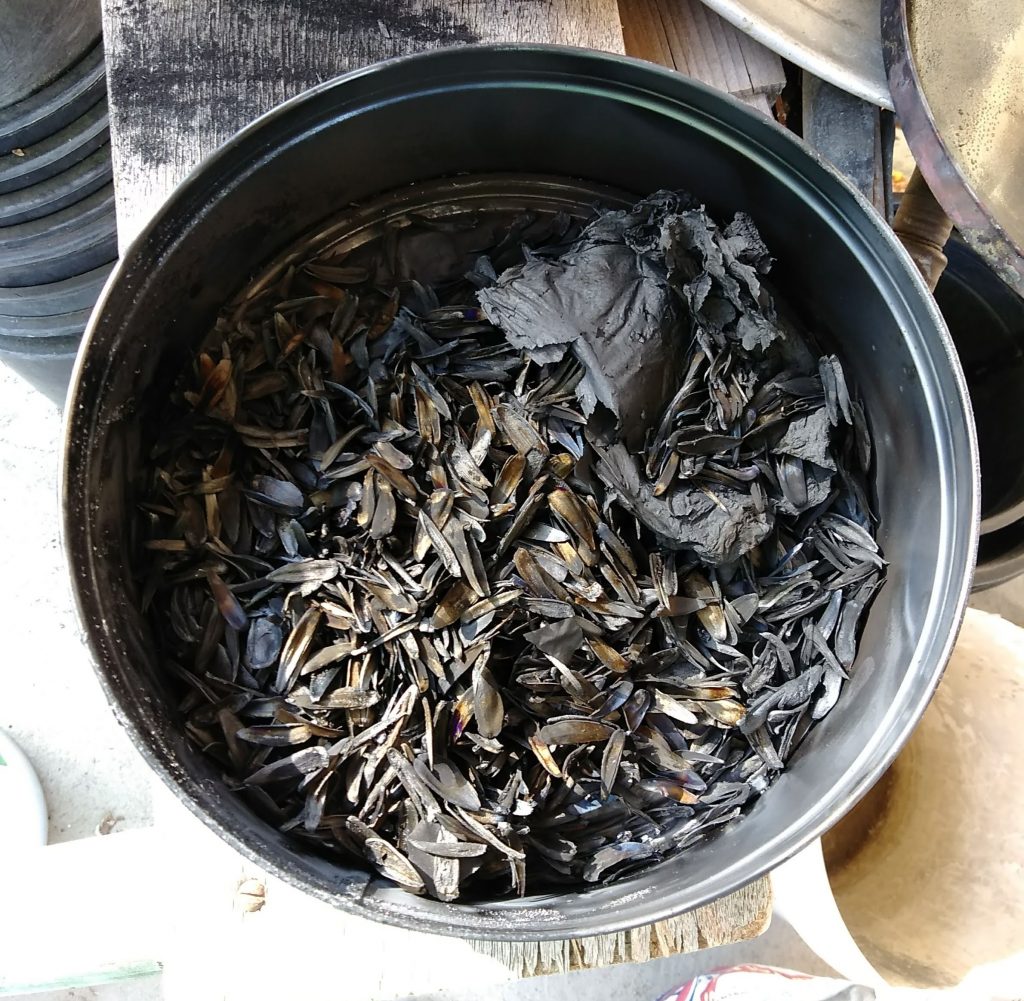
The three pictures show a cookie tin I modified by punching a few small holes in the bottom, to create a kind of retort, to create charcoal. The can was filled with sunflower seed shells and a piece of paper napkin.
The canister basically worked. It was placed at the bottom of the BBQ, and covered with wood.
When the wood was ignited, it burned up, burning off some of the paint on the can, and causing the contents to heat up and gasify a little bit. It looks like it didn’t really get hot enough to complete the charcoal, but that’s okay.
Overall, this worked out well.
Also, quenching the charcoal with water worked ok, as well. I ended up putting it into a bucket for soaking. The bucket had some holes stabbed into the bottom, but they plugged up so only a little water dripped out.

Failure: Burning a Stump
My mom’s had this stump a couple years, so I tried to burn it out.
It didn’t work. The stump burned, but also smoked a lot. Very little of the wood burned.

What happened was simple: the tree still had water in it. It was dead, but the water still got into the roots.
As the stump heated up, it let out more and more steam. It also stank.
So I put the fire out. Then, we had to hack at the root and dig around it, then flood it to make sure there were no embers in the stump.
Overall, it was a waste of time. It was wiser to just let the wood rot over time.
The area, however, did get some biochar mixed into the dirt, so the decomposition might go a little faster.